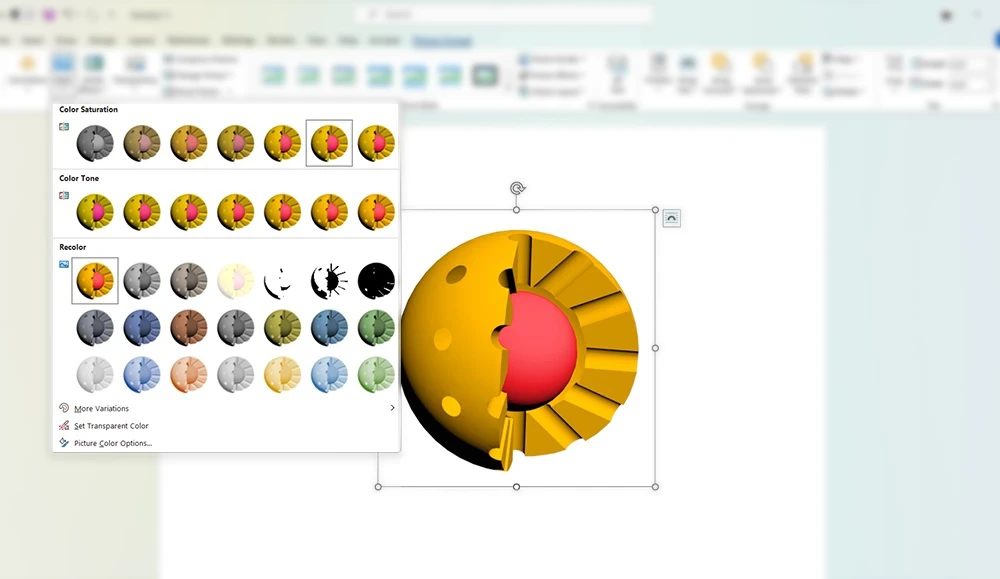
Many students may not be able to find an image with the desired color in search engines when they want to design a graphical abstract. That’s why they need to change the color of images in Word . In this article, we’ll teach you how to change the whole or part of an image in Word.
Selecting the appropriate images
The most difficult part of this work is to find the images you need in a PNG format that does not have a background (Transparent). You should search the PNG formats in Google Images to find the appropriate image. If you use JPEG images, you need to delete them owing to having white or colored backgrounds, as is taught in the article.
Removing the background in Word for JPEG formats
- First, go to the Insert section, click on the Pictures option, and select the image you want to appear in Word.
- The Picture Format section is activated by clicking on the image.
- If your image is in JPEG format or in formats that have a background, the background image will be deleted by selecting the Remove Background option.
- Automatically the background will be selected, but sometimes some part of the image will be selected wrongly. In order to correct this error you should click on Marks Areas To Keep and mark the part of the image that was selected wrongly.
- Then click on Keep Changes to remove the background.
Change the color of images in Word
- The Picture Format section is activated by clicking on the image. In this section, click on the Color section to open the drop-down box.
- In the Color section, click on the Picture Color Option to display the Format Picture section on the right side of the Word.
- In the Format Picture section, you can apply various options such as Contrast, Brightness, Sharpness, Saturation, and so forth.
- In the Format Picture section, selecting the Recolor and Temperature option can change the entire image to a single-color structure.
Color change of the only part of a picture
- In the Format section, select the In Front of Text option in Wrap Text to remove the image from the locked state. With this, you can move the image anywhere in Word.
- Then make another copy of your image.
- Select one of the images and in the Recolor section, change the color of the image to a mono-color.
- By clicking on the other image, go to the Format section and select the Remove The Background section.
- If you select the Mark Areas To Remove option, you can delete the parts of the shape you do not need by dragging the mouse.
- Finally, click on the Keep Change.
Arranging all parts
- At this point, you have two images with two different colors that you can arrange (see the educational arrangement of images in Word)
- It can also be used for more complex images.
If the scientific illustration or graphical abstract design takes a long time or you want to have a very professional design, it’s suggested that you trust the Inmywork team for your design.

